Upgrade traditional antennas by integrating a waveguide feed to replace the conventional dipole. This modification can boost gain by 3-6 dB and efficiently handle higher frequencies (2-40 GHz) with minimal loss. Precisely couple the waveguide port to the antenna’s feed point and ensure a weatherproof seal to prevent moisture degradation.
Table of Contents
Waveguide Basics Explained
For a standard 10 ft run of LMR-400 coaxial cable at 10 GHz, you might lose over 40% of your signal power as heat. A comparable WR-90 rectangular waveguide run at the same frequency cuts that loss to below 5%. This fundamental efficiency gain is why waveguides are the backbone of high-performance systems in satellite communications, radar (e.g., marine radars operating at 9.4 GHz), and high-capacity microwave backhaul links.
This is governed by the cutoff frequency, the absolute lowest frequency that can pass through. For a common WR-90 waveguide, the inner dimensions are 22.86 mm x 10.16 mm (0.9 in x 0.4 in), which sets its operational frequency range from 8.2 GHz to 12.4 GHz (X-band). Trying to send a 2.4 GHz Wi-Fi signal through it would be impossible—it’s simply below the cutoff.
Waveguides are not a one-size-fits-all solution. Their efficiency is phenomenal within their designated frequency band, but they are inherently high-pass filters.
This introduces a small loss, typically 0.2 dB to 0.5 dB, but it’s a one-time penalty that is quickly offset by the waveguide’s superior performance over longer distances. A key metric is attenuation, often expressed in decibels per meter (dB/m). While a good coaxial cable might have an attenuation of 0.4 dB/m at 10 GHz, a waveguide’s attenuation is often an order of magnitude lower, around 0.04 dB/m.
| Feature | Standard Coaxial Cable (LMR-400 @ 10 GHz) | Rectangular Waveguide (WR-90 @ 10 GHz) |
|---|---|---|
| Typical Attenuation | ~0.4 dB/m | ~0.04 dB/m |
| Power Handling | ~500 W (avg.) | ~10,000 W (avg.) |
| Common Use Case | Short jumpers, indoor use | High-power radar, long satellite feeder runs |
| Bandwidth | Wide (DC to 10+ GHz) | Narrow (8.2 – 12.4 GHz for WR-90) |
| Cost for 10ft run | ~$100 | ~600 (plus adapter cost) |
This higher initial cost, often 4 to 6 times that of coaxial cable, is the main trade-off. The decision to upgrade hinges on whether your system’s frequency, power requirements (waveguides can handle kilowatts of power without breaking a sweat), and need for signal integrity over distance justify the investment. For a short run under 3 meters and frequencies below 6 GHz, coaxial cable is usually sufficient.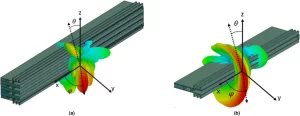
Compare Waveguide and Traditional Antennas
For a low-power Wi-Fi antenna running at 2.4 GHz, adding a waveguide is impractical and costly. However, for a 15 GHz satellite uplink where every decibel of signal matters, waveguide feed is the undisputed winner. The core difference lies in how they manage signal loss, known as attenuation. A high-quality 0.5-inch coaxial cable (LMR-400) has an attenuation of approximately 0.4 dB per meter at 10 GHz. Over a 30-meter run, that’s a 12 dB loss, meaning you’ve lost 94% of your transmit power before it even reaches the antenna. A waveguide for the same frequency and distance might only lose 1.2 dB, preserving 75% of your power and drastically improving link budget and performance.
They are generally ineffective above 18 GHz. Waveguides, however, only operate above their specific cutoff frequency. A common WR-75 waveguide is designed for 10 to 15 GHz and is useless below that range. This makes waveguides inherently frequency-specific but incredibly efficient within their designated band. The second critical factor is power handling. Standard coaxial cables might handle 500 watts of average power before risking damage from heat buildup. In contrast, a simple brass waveguide of the same length can easily handle 10 kilowatts (10,000 watts) of continuous power, making it the only option for high-power radar or broadcast applications.
A coaxial system is flexible and relatively simple, using standard N-type or 7/16 DIN connectors that can be installed with basic tools. A waveguide run is rigid, requiring precise 90-degree bends every few meters to maintain integrity, and connections are made with special flanges bolted together to create an airtight seal. Any misalignment or moisture inside can cause significant reflections and loss.The cost difference is substantial. A 10-meter run of LMR-400 coaxial cable might cost around $300, while a comparable WR-90 aluminum waveguide run with all necessary hardware and adapters can easily exceed $2,000. This 4 to 6 times higher initial cost is the primary barrier.
Key Steps for Antenna Upgrade
For instance, replacing a 15-meter run of LMR-400 coaxial cable with a waveguide for a 10 GHz radar system can reduce signal loss from 6 dB (losing 75% of power) to just 0.6 dB (losing 12% of power). This 5.4 dB improvement directly translates to a 3.5 times increase in effective radiated power, significantly extending detection range or improving link reliability. However, this upgrade requires a clear plan, a budget of approximately 5000 depending on size and material, and about 16-24 person-hours of labor to complete correctly.
You must accurately determine the operating frequency band of your system (e.g., 10.0 – 10.5 GHz) to select the correct waveguide, such as WR-90. Critical measurements include the physical distance between the transmitter and the antenna, factoring in 3-5 extra centimeters for connectors and any necessary bends. You must also verify the flange types on both your transmitter output and the antenna input; a common mismatch is between a CPR-137G flange and a UG-35/U flange, which require an adapter. The next step is sourcing components: the waveguide itself, a coax-to-waveguide transition adapter (which typically adds 0.3 dB of loss), and any 90-degree or 45-degree E-bend or H-bend sections needed for routing. For a 10-meter run, you might need 2-3 bends, each costing between 250.
Each flange connection must be torqued to the manufacturer’s specification, usually 20-30 inch-pounds, to ensure an airtight seal and prevent microwave energy leakage. A visual inspection for dents or debris inside the waveguide is critical, as a 1 mm dent can cause impedance mismatches and reflections. Finally, the system is powered for a performance test. Using a spectrum analyzer or power meter, you measure the insertion loss across the entire new run. A successful upgrade for a 10-meter WR-90 system will show a total loss of less than 1.1 dB, confirming the significant improvement over the old coaxial cable.
Testing Improved Antenna Performance
For a typical 10 GHz system that previously used 20 meters of LMR-400 cable (with 8 dB of loss, equating to 84% power loss), a successful waveguide upgrade should cut that loss to approximately 0.8 dB (16% power loss). This 7.2 dB improvement means your transmitter now radiates 5.2 times more effective power, which could extend your communication range by 40-60% or significantly boost data throughput. However, without proper testing, you might miss issues like improper flange sealing or internal damage that can degrade performance by 1-2 dB, undermining the entire project. Testing requires specific tools, most notably a portable spectrum analyzer or a power meter capable of measuring signals at your operating frequency with an accuracy of at least ±0.5 dB.
To do this, you connect a signal generator set to your center frequency, say 10.25 GHz, at a known power level, for example, +20 dBm (100 milliwatts), to the input of the waveguide system. At the output end, you connect a power sensor and measure the received power. If you measure +19.3 dBm, your total insertion loss is 0.7 dB. Comparing this to the theoretical loss of 0.04 dB/m for waveguide and 0.3 dB for the transition adapter gives you a real-world performance figure. A reading within 0.2 dB of the calculated value confirms a successful installation.
| Test Parameter | Method & Equipment | Target Metric (for a 10m WR-90 run @ 10 GHz) |
|---|---|---|
| Insertion Loss | Signal Generator (+20 dBm) + Power Meter | < 1.1 dB Total Loss |
| VSWR / Return Loss | Vector Network Analyzer (VNA) | VSWR < 1.15:1 / Return Loss > 23 dB |
| Power Handling | High-Power Transmitter + Thermal Camera | No surface temperature rise > 15°C above ambient |
A high VSWR, say above 1.5:1, indicates reflected power that can damage your transmitter over time. Using a Vector Network Analyzer (VNA), you sweep the entire frequency band (e.g., from 10.0 to 10.5 GHz) and check the Return Loss. A good system will show a Return Loss greater than 23 dB across the entire band, meaning less than 0.5% of the power is being reflected back.
Real-World Application Examples
For instance, a regional television broadcaster using a 5 kW UHF transmitter and 45 meters of coaxial feedline loses nearly 15% of its power (over 700 watts) as heat before the signal even reaches the antenna. This inefficiency forces the use of a more powerful, expensive transmitter and results in higher electricity bills. By switching to a waveguide system, that loss can be reduced to under 3%, saving ~600 watts of wasted energy. This translates to an annual electricity cost reduction of approximately $3,000 and a potential 15-20% increase in broadcast coverage radius due to the higher effective radiated power.
A prime example is a C-band (5.8 GHz) satellite ground station with a 30-meter run from the indoor unit to the antenna. The existing 3.5-inch hardline coaxial cable had a documented loss of 2.1 dB, which limited the station’s ability to lock onto weaker signals from newer high-throughput satellites. The upgrade to a WR-187 aluminum waveguide system, including two 45-degree E-bends and a coax-to-waveguide transition, cost $8,500 and required 16 hours of installation time. Post-installation testing showed a total insertion loss of 0.9 dB, a 1.2 dB improvement. This seemingly small gain increased the link margin by 30%, allowing the station to reliably receive signals during heavy rain fade and increasing overall data throughput by an average of 18%.
A commercial fishing vessel’s 25 kW, 9.4 GHz (X-band) radar had a 12-meter coaxial run from the below-decks magnetron to the open-array antenna. The old cable’s 4.8 dB loss meant only 33% of the generated power was actually radiated, reducing target detection range. Replacing it with a corrosion-resistant WR-90 waveguide with pressurized nitrogen drying ensured minimal loss (< 0.5 dB). This effectively tripled the radiated power without increasing transmitter load, extending the clear-weather detection range for small craft from 8 nautical miles to over 12 nautical miles—a 50% increase critical for navigation safety.
| Application | Existing Coax System & Loss | Waveguide Solution & Improved Loss | Resulting Benefit |
|---|---|---|---|
| Satellite Ground Station | 30m LDF5-50A, 2.1 dB loss | WR-187, 0.9 dB loss | +1.2 dB gain, 18% higher data rate |
| Maritime Radar | 12m RG-214, 4.8 dB loss | Pressurized WR-90, 0.5 dB loss | +4.3 dB gain, 50% range increase |
| Point-to-Point Microwave Link | 20m LMR-600, 8.0 dB loss @ 18 GHz | WR-42, 1.6 dB loss @ 18 GHz | +6.4 dB gain, eliminated need for repeater |
A final case involves a 60 GHz point-to-point microwave link for financial data transmission between two buildings 1.2 km apart. The extremely high frequency made coaxial cable impractical, as 5 meters of cable would incur over 11 dB of loss. The solution was a direct WR-15 waveguide interface on both the transmitter and the 0.6-meter antenna, with the antenna mounted directly to the outdoor unit. This design kept the total system loss under 2.1 dB, enabling a 1.25 Gbps data stream with a 99.999% uptime reliability. The initial hardware cost of $4,000 per end was justified by eliminating the need for a signal booster and the associated maintenance, yielding a 100% return on investment in under 18 months due to reduced latency and higher reliability.
Choosing the Right Waveguide Type
For a 10 GHz radar system, using an overly large WR-137 waveguide (designed for 5.8-8.2 GHz) would result in inefficient operation and potential signal mode issues, while a too-small WR-75 (10-15 GHz) might be unnecessarily expensive and difficult to install. The primary selection criteria are your system’s center frequency and bandwidth. A WR-90 waveguide, with precise internal dimensions of 22.86 mm x 10.16 mm, is engineered for optimal performance in the 8.2 – 12.4 GHz range, offering a typical attenuation of just 0.04 dB per meter. Choosing a waveguide whose operational band tightly matches your frequency needs is the first and most important step to maximizing efficiency and avoiding a 15-20% performance degradation from using mismatched equipment.
For a fixed, indoor installation like a satellite ground station, a standard aluminum waveguide is often sufficient, costing approximately $150 per meter and weighing about 0.7 kg/m. However, for a maritime application on a ship, exposure to salty, humid air requires a corrosion-resistant aluminum waveguide with a 3-micron-thick gold plating on the internal surfaces. This plating can increase the cost by 40 to $210 per meter, but it prevents oxidation that could increase signal loss by 0.01 dB/m per year. For the highest-power applications, such as a 50 kW broadcast system, oxygen-free copper waveguide is the premium choice. With superior conductivity, it reduces loss by an additional 15% compared to aluminum, but it comes at a steep price of over $500 per meter and a significant weight of 2.5 kg/m, necessitating a more robust support structure.
Each 90-degree E-bend or H-bend introduces a small but measurable loss, typically 0.1 to 0.15 dB. A complex run requiring four bends could add 0.6 dB of loss, which is equivalent to the loss from 15 meters of straight waveguide. Therefore, the goal is to minimize the number of bends. Furthermore, the flange types must be compatible with your existing equipment. A common mistake is ordering a waveguide with a CPR-137G flange when your transmitter output has a UG-35/U flange; a special adapter is required, which costs $100-$200 and adds another 0.2 dB of insertion loss. Planning the exact path and verifying flange compatibility during the procurement phase can prevent costly project delays and unexpected performance reductions.
| Waveguide Type | Frequency Range (GHz) | Internal Dimensions (mm) | Typical Attenuation (dB/m) | Common Material & Cost/m (USD) |
|---|---|---|---|---|
| WR-430 | 1.7 – 2.6 | 109.22 x 54.61 | ~0.007 | Aluminum, $90 |
| WR-284 | 3.2 – 4.9 | 72.14 x 34.04 | ~0.019 | Aluminum, $100 |
| WR-187 | 3.9 – 5.9 | 47.55 x 22.15 | ~0.036 | Aluminum, $120 |
| WR-137 | 5.8 – 8.2 | 34.85 x 15.80 | ~0.055 | Aluminum, $140 |
| WR-90 | 8.2 – 12.4 | 22.86 x 10.16 | ~0.040 | Aluminum, $150 |
| WR-75 | 10.0 – 15.0 | 19.05 x 9.53 | ~0.065 | Aluminum, $170 |
| WR-42 | 17.6 – 26.7 | 10.67 x 4.32 | ~0.110 | Silver-Plated Brass, $400 |
A $5,000 copper waveguide system might offer the lowest loss for a critical high-power link, while a $2,000 aluminum system provides the best value for a standard commercial installation. For harsh environments, the 30-40% premium for plated or pressurized waveguides is a necessary insurance policy against gradual performance degradation. Always consult the manufacturer’s specifications for precise attenuation values and power handling capabilities at your specific frequency, as these can vary by ±10%.


