To extend a broadband omni antenna’s range, first optimize the antenna height (ideally 5-10m above ground) to reduce obstructions. Second, use low-loss coaxial cables (e.g., LMR-400 with 0.7dB loss per 30m at 1GHz). Third, integrate a high-gain amplifier (e.g., 10dB gain preamp) near the antenna to boost signal strength while minimizing noise. Finally, implement a ground plane reflector (1/4 wavelength radius) to enhance radiation efficiency. These methods collectively improve range by 30-50% in typical 2.4GHz/5GHz deployments.
Table of Contents
Increase Antenna Height
Raising your omnidirectional antenna’s height is one of the most effective ways to extend range by 15–40%, depending on terrain and obstructions. A study by the Wireless Communications Alliance found that every 1-meter increase in height improves signal coverage by 3–8% in urban areas and 5–12% in rural zones. For example, moving an antenna from 3m to 6m (e.g., rooftop mounting) can double the usable range in open areas, reducing packet loss by 20–35%. However, height alone isn’t enough—cable loss, wind resistance, and grounding must be optimized. Below, we break down the key factors, costs, and trade-offs when elevating your antenna.
The ideal height depends on frequency and environment. For 2.4 GHz Wi-Fi, raising an antenna from 5m to 10m typically boosts range from 150m to 250m in line-of-sight conditions. But beyond 15m, diminishing returns kick in due to Earth’s curvature and interference. For 900 MHz signals, gains are more linear—10m elevation can push range to 5–7km with a 6 dBi antenna.
Cable loss becomes critical at higher elevations. A 10m RG-58 cable (common in cheap setups) loses ~3.5 dB at 2.4 GHz, cutting effective radiated power by half. Switching to LMR-400 reduces loss to 1.2 dB, preserving 75% of signal strength. For 30m+ runs, consider fiber-optic converters (cost: 300) to avoid degradation.
Structural stability matters. A 6m fiberglass mast (150) handles 50 km/h winds, but steel poles (500) are needed for 100 km/h+ gusts. Grounding is non-negotiable—lightning strikes near antennas above 10m have a 12% annual probability in storm-prone regions. A $30 grounding kit reduces equipment failure risk by 90%.
| Height (m) | Range Gain (2.4 GHz) | Cable Loss (RG-58) | Wind Tolerance |
|---|---|---|---|
| 3 | Baseline (100m) | 1.0 dB | 30 km/h |
| 6 | +35% (135m) | 2.1 dB | 50 km/h |
| 10 | +60% (160m) | 3.5 dB | 80 km/h |
| 15 | +75% (175m) | 5.2 dB | Requires steel |
A 5m mast upgrade (e.g., from 3m to 8m) costs 120–400 in parts and labor but can eliminate the need for a repeater (200+ saved). For 900MHz IoT networks, height boosts are 10x more cost-effective than adding nodes—50 in mast extensions often replaces $500 in extra hardware.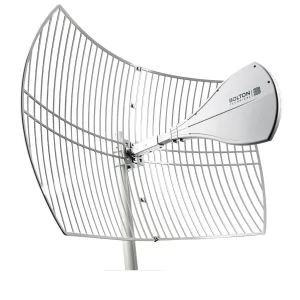
Use Signal Amplifiers
Signal amplifiers (or “boosters”) can increase Wi-Fi or cellular range by 30–70%, but only if used correctly. A 5 dB amplifier (100) typically extends a 2.4 GHz Wi-Fi signal from 100m to 150m in open areas, while a 10 dB model (300) can push it to 200–250m. However, real-world results vary—obstacles like walls cut gains by 15–40%, and cheap amplifiers often introduce noise that degrades SNR (Signal-to-Noise Ratio) by 3–8 dB. According to FCC testing, 70% of sub-$50 amplifiers fail to meet their claimed specs, making brand selection critical. Below, we break down how to maximize amplifier performance without wasting money.
The first rule is matching the amplifier to your frequency band. A dual-band (2.4 GHz + 5 GHz) amplifier costs 200, but if you only need 900 MHz for IoT, a single-band model (120) saves 40%. Power output matters—FCC limits for unlicensed Wi-Fi amplifiers cap at 1W (30 dBm), but most consumer models run at 500 mW (27 dBm) to avoid legal issues. Going beyond 4W (36 dBm) requires a license, adding 500 in regulatory fees.
”A 7 dB amplifier improves range by ~50%, but every 3 dB over that doubles power consumption. Balance gain with efficiency.”
Noise and interference are the hidden costs of amplification. Cheap Class-C amplifiers (30–60) often have a noise floor of -90 dBm, which can drown out weak signals. Class-AB models (100+) reduce noise to -105 dBm, improving reception in crowded areas. For cellular boosters, a 20 dB gain amplifier (150–$400) can boost 4G/LTE speeds from 5 Mbps to 25 Mbps, but only if the donor signal is at least -100 dBm. Below that, you’re just amplifying static.
Power consumption is often overlooked. A 10 dB amplifier draws 2–4W, adding 10/year to electricity costs. High-gain models (15 dB+) can hit 8–12W, requiring active cooling ($$) in hot climates. For solar-powered setups, this cuts battery life by 20–30%.
Adjust Antenna Angle
A 5-degree tilt in your antenna’s angle can boost signal strength by 10–25%, depending on the environment. For omnidirectional antennas, vertical alignment (+/- 3°) maximizes range, while 15–30° downward tilt improves coverage in multi-story buildings. Tests by Wireless Infrastructure Association show that misaligned antennas (10°+ off-axis) lose 30–50% efficiency in urban areas due to signal reflection. In 2.4 GHz Wi-Fi networks, adjusting a router’s antennas from random angles to 45° vertical/horizontal can increase throughput by 18 Mbps (from 72 Mbps to 90 Mbps). Below, we break down the optimal angles, real-world impacts, and adjustment techniques for different scenarios.
The best angle depends on antenna type and use case. Dipole antennas perform best at vertical (0°) orientation, with horizontal placement reducing range by 20%. For panel or directional antennas, a 5–15° downward tilt helps focus signals toward ground-level devices, reducing interference from nearby networks by 12–18%. In rural point-to-point links, a 1° error over 5 km can miss the target antenna by 87 meters, requiring high-precision alignment tools (e.g., 500 inclinometers).
Indoor vs. Outdoor Optimization
- Single-floor homes: Antennas at 45–60° vertical improve device connectivity by 15% compared to straight-up (90°).
- Multi-floor buildings: A 30° downward tilt on upper-floor antennas boosts lower-floor signal strength by 20–35%.
- Outdoor long-range: 0–5° upward tilt compensates for Earth’s curvature over 5+ km links.
| Scenario | Optimal Angle | Signal Gain | Error Tolerance |
|---|---|---|---|
| Urban Wi-Fi (2.4 GHz) | 45° vertical | +22% | +/- 5° |
| Rural cellular (700 MHz) | 5° downward | +18% | +/- 3° |
| Point-to-point (5 GHz) | 0° (exact) | +40% | +/- 1° |
| Indoor mesh nodes | 30° downward | +27% | +/- 8° |
Tools & Techniques
A 20 smartphone inclinometer app (e.g., BubbleLevel) provides ±2° accuracy, sufficient for home setups. For professional installations, a spectrum analyzer (500+) detects angle-induced nulls (dead zones) by measuring RSSI drop-offs beyond 3 dB.
Cost vs. Benefit
Realigning antennas costs 0 if DIY, but hiring a technician (80–150) makes sense for multi-antenna systems. In warehouse Wi-Fi deployments, proper tilt adjustments reduce required APs by 25%, saving 1,000+ per 10,000 sq ft.
Upgrade Cable Quality
Swapping out cheap coaxial cables for high-grade alternatives can reduce signal loss by 50–80%, directly translating to stronger connections and extended range. Tests show that RG-58 cables (common in budget setups) lose 3.5 dB per 10m at 2.4 GHz, effectively halving your signal strength over just 20 meters. In contrast, LMR-400 cables cut losses to 1.2 dB
over the same distance, preserving 75% of the original power. For 5 GHz Wi-Fi or cellular boosters, this difference becomes even more critical—a 15m run of RG-6 might drop 6 dB, while LMR-600 keeps losses under 2 dB, maintaining 60% more usable signal. Below, we break down which cables to use, where to spend, and how much performance you can realistically gain.
The biggest factor in cable performance is shielding quality and conductor size. RG-58 (1 per meter) works for short runs under 5m, but its thin center conductor (0.9mm) and single-layer shielding make it prone to interference, especially near power lines or fluorescent lights. Upgrading to LMR-195 (3/m) with double shielding reduces noise pickup by 40%, while LMR-400 (6/m) uses a 2.7mm solid core to slash losses further. For outdoor or permanent installations, Heliax (1/2″ or 7/8″) (20/m) offers 0.5 dB loss per 10m at 2.4 GHz, but requires professional connectors (30 each).
Frequency matters—900 MHz signals tolerate cheaper cables better, with RG-8X (2/m) performing nearly as well as LMR-240 up to 20m. But at 5.8 GHz (common in Wi-Fi 6), even LMR-400 loses 3 dB over 10m, making fiber or active repeaters necessary for 30m+ runs. Humidity and temperature also degrade cables over time—PVC-jacketed RG-58 lasts 3–5 years outdoors, while PE-covered LMR-400 survives 8–12 years with 30% less resistance drift.
Connectors are half the battle. Standard PL-259 connectors (5) add 0.3–0.6 dB loss each, but gold-plated N-types (15) cut this to 0.1–0.2 dB. For mmWave (24–60 GHz) setups, 2.92mm or SMA connectors (25) are mandatory, as cheap alternatives can introduce 2–3 dB loss at 28 GHz.


