Selecting a high-gain antenna requires evaluating four key factors: frequency range (e.g., 2.4GHz or 5GHz for Wi-Fi), gain rating (15-20dBi for long-range), radiation pattern (omnidirectional vs directional), and impedance matching (50Ω standard). For optimal performance, ensure proper alignment (within ±5° of target) and elevation (minimum 3m clearance). Outdoor models should have IP65+ waterproofing, while grid/parabolic designs achieve 3dB higher gain than panel antennas. Always verify VSWR <1.5:1 with an analyzer during installation.
Table of Contents
Assess Your Location and Obstacles
Think of your Wi-Fi or cellular signal like sound waves. Shouting across an open field is easy, but try having a clear conversation from opposite ends of a busy factory floor packed with machinery – it gets much harder, fast. Radio signals face similar challenges. Real-world data shows that simply passing through one interior wall can easily knock 3 dB off your signal strength. That means the power reaching the other side is literally halved. Obstacles aren’t just minor annoyances; they fundamentally dictate whether your high-gain antenna investment actually solves your range or reliability problem. Ignore your environment, and even the most powerful antenna can become an expensive paperweight.
For indoor setups, the materials around you are the primary concern. Common interior walls, especially drywall or lightweight office partitions, typically absorb 3-5 dB per wall. That might not sound catastrophic initially, but string together three or four rooms, and you’re looking at potential losses of 9-20 dB – enough to push a marginal signal into unusable territory (< -80 dBm for Wi-Fi). Brick walls, concrete pillars, and firewalls are signal killers, easily causing 10-25 dB or more of attenuation per obstacle. Even large appliances, metal filing cabinets, or densely packed inventory on warehouse racking create significant “RF shadows” where signals weaken dramatically. Tinted or Low-E (low-emissivity) windows, common in modern buildings, can be surprisingly detrimental, blocking 15-25 dB of signal – effectively turning what looks like a clear path into an invisible barrier.
”The 3-dB Rule: Every 3 dB of loss means your usable signal power is cut in half. Every 3 dB of gain doubles the effective power. Minimizing loss from obstacles is often as critical as antenna gain itself.”
Outdoor environments introduce terrain and the critical “line of sight” (LoS) concept. High-gain antennas perform best when there’s a clear path between the antenna and the target (like a tower or another antenna). Even if you can see the distant point, radio signals don’t just travel in a straight, narrow beam like a laser. They require a significantly clearer zone called the Fresnel Zone – an elliptical area around the direct visual path – to propagate efficiently. Obstructions within this zone, even if not blocking direct sight (like tree branches, rooftops, billboards, or slight hill crests), can cause severe signal degradation through diffraction or scattering. As a rule of thumb, at least 60% of the radius of the first Fresnel zone must be clear of obstructions for a reliable link. This clearance need grows larger with distance and higher frequencies; a 5 GHz link needs roughly twice the Fresnel zone clearance compared to a 2.4 GHz link over the same distance. If you’re deploying an antenna to bridge two buildings, carefully map the elevation profile and identify potential blockers like trees, water towers, or other structures – they can completely negate the benefit of a high-gain antenna.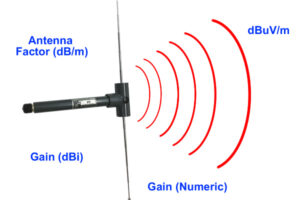
Determine Your Required Coverage Range
Think of your wireless signal like a flashlight beam. A higher-gain antenna focuses that beam tighter and shoots it farther, but the trade-off is a narrower beamwidth. Simply wanting “better range” isn’t enough; you need to define exactly how far your signal must reliably travel. Guessing is expensive. Misjudging means either wasted money on excessive gain or frustrating dead zones where you needed coverage. For context, a typical laptop Wi-Fi adapter receives signals down to roughly -75 dBm for basic web browsing. To stream HD video or make reliable VoIP calls, you often need stronger signal levels, like -67 dBm or better, at your device. The antenna’s job is to bridge the gap between the signal available at its location and the strength needed at your distant device. The required coverage distance directly dictates how much gain you actually need.
Physics fundamentally limits range. Radio signals weaken predictably over open space due to Free Space Path Loss (FSPL). This loss increases dramatically with both distance and frequency. As a rule of thumb, for the same power and antenna setup, a 5 GHz signal will travel only about half as far as a 2.4 GHz signal outdoors. Here’s a simplified comparison illustrating maximum potential range in a near-ideal, open field environment with no obstacles for different frequencies and antenna gains. Actual usable range will be significantly shorter due to real-world obstacles and interference:
| Frequency | Omnidirectional Antenna Gain | Max Theoretical Range (Approx.) | Directional Antenna Gain | Max Theoretical Range (Approx.) |
|---|---|---|---|---|
| 2.4 GHz | 3 dBi (Standard Router) | ~130 feet (40 meters) | 12 dBi | ~260 feet (80 meters) |
| 2.4 GHz | 8 dBi | ~210 feet (65 meters) | 18 dBi | ~520 feet (160 meters) |
| 5 GHz | 5 dBi (Standard Router) | ~70 feet (20 meters) | 16 dBi | ~140 feet (42 meters) |
| 5 GHz | 10 dBi | ~110 feet (33 meters) | 24 dBi | ~280 feet (85 meters) |
Real-world environments drastically reduce these ideal ranges. While higher gain antennas (like 18 dBi or 24 dBi in the table) extend range significantly in clear lines of sight, their effectiveness plummets in cluttered settings. Imagine trying to cover 500 feet outdoors around a bend in a river, through dense trees, or inside a warehouse packed with metal shelving and inventory. The RF signal path suffers attenuation (loss) far greater than the simple FSPL shown above. Obstacles turn long-distance dreams into unreliable connections or complete dropouts, even with a powerful antenna.
”Higher gain focuses power like a laser beam – excellent for specific point-to-point links over long distances with clear line-of-sight, but often overkill and too narrow for general indoor or obstacle-filled coverage expansion.”
Match Frequency to Your Device
Think of your antenna and device as a lock and key system. A 5.8 GHz antenna simply won’t pick up a 900 MHz signal – even if it looks identical externally. This mismatch is one of the most common installation failures we see. Operating outside the antenna’s rated frequency band can cause up to a 3 dB loss in efficiency – effectively wasting half your potential signal strength. Worse, it might not work at all. For example, plugging a 2.4 GHz antenna into a 5 GHz router will cripple its performance. Matching the RF frequency isn’t optional; it’s non-negotiable for functional communication. Before looking at gain, specs, or price, this must be correct.
Your device dictates the required frequency band. Don’t guess – check its manual, model number, or technical specifications. Here’s a quick guide to common frequency bands and their primary uses:
| Device / Application | Typical Operating Frequency | Critical Note |
|---|---|---|
| Home Wi-Fi Router | 2.4 GHz or 5 GHz | Dual-band routers need antennas supporting BOTH |
| Modern Wi-Fi 6E/7 Router | 6 GHz | Requires specifically designed 6 GHz antennas |
| Cellular Hotspot (4G LTE) | 700 MHz, 1.9 GHz, 2.1 GHz | Band varies by carrier & region (check!) |
| LoRaWAN / IoT Sensors | 915 MHz (US), 868 MHz (EU) | Regional ISM band restrictions apply |
| Bluetooth® Devices | 2.4 GHz | Antenna gain has minimal impact (short-range) |
| GPS/GNSS Receivers | 1.575 GHz (L1 band) | Requires ultra-precise GPS antennas |
| Two-Way Radios (MURS) | 151–154 MHz | Very Low-Frequency antennas (physically larger) |
Specialized equipment demands precision antennas. Cellular boosters, drone controllers, and satellite terminals all operate on licensed frequencies with strict tolerances. Using an antenna tuned for Wi-Fi on a 4G/LTE cellular system (like 700 MHz) will fail catastrophically – the antenna can’t efficiently transmit or receive energy outside its resonant band. This isn’t a minor performance dip; it can mean 0% connectivity. If you’re installing an antenna for a marine radio (~162 MHz) or aviation comms (~118-137 MHz), you must match the exact MHz range listed in its FCC/CE certification.
”Operating an antenna outside its design frequency is like putting diesel in a gasoline engine. It might sputter briefly, but it won’t run. Never force-fit an antenna frequency – the GHz numbers MUST align.”
Consequences of mismatching include:
- Severe Signal Degradation: Expect ≥3 dB loss (50% power reduction) per incorrect GHz offset.
- Impedance Mismatch: Causes reflected power (VSWR >2:1) potentially damaging transmitters.
- Physical Damage Risk: Especially with high-power systems like CB radios or RF amplifiers.
- Regulatory Violations: Operating outside authorized bands risks FCC/CE fines in regulated spectrum.
How to get it right:
- Find Device Specs: Search “[Your Device Model] + frequency bands” or “operating frequency”. FCC ID lookups (fccid.io) reveal official RF details.
- Read Antenna Labels: Legitimate antennas list resonant bands prominently (e.g., “5.15–5.85 GHz” or “LTE Band 12/17/13”).
- Confirm Connector Compatibility: N-type (robust), SMA (common Wi-Fi), TNC (vibration-resistant) – mismatched connectors prevent physical install.
- Verify IoT/Regional Bands: LoRa, Sigfox, and others use country-specific ISM bands. Don’t assume US frequencies work in Europe/Asia.
Consider Antenna Size and Mounting
Don’t underestimate the physical reality of high-gain antennas. That powerful 18 dBi directional panel or 8-foot Yagi you’re eyeing isn’t a sleek USB stick you tuck behind a monitor. Physics dictates size: higher gain often means significantly larger dimensions and stricter positioning demands. An antenna promising +10 dB gain over stock might be manageable indoors—perhaps panel-style antennas like a 12-inch x 8-inch flat mount. But bump that to +18 dBi, and you’re suddenly wrestling with a 4-foot-long Yagi or a 2-foot-diameter parabolic dish that needs serious mounting hardware. Ignoring size and installation needs transforms an upgrade into an expensive headache gathering dust in your garage.
Antenna size directly impacts deployment possibilities. Trying to install a large directional antenna inside a typical home office or apartment? It’s often impractical. Most directional antennas over 15 dBi are simply too bulky and visually intrusive for discreet indoor setups. Even smaller gain-boosting antennas (say, 8 dBi) require careful placement: metallic bodies or electrical wiring within 12–18 inches can distort radiation patterns or cause interference, nullifying their benefit. Window mounts seem convenient, but low-emissivity (Low-E) coatings—found on ~75% of modern windows—can block 15–25 dB of signal, turning that “perfect” spot into a signal dead zone.
📏 Size vs. Gain Reality Check:
A 2.4 GHz dipole needs ≈7 inches for 3 dBi gain.
A 2.4 GHz 18 dBi Yagi stretches to ≈4 feet long.
A 24 dBi parabolic dish at 5 GHz needs 1–2 ft diameter.
Mounting isn’t just about bolting something down—it’s about stability, safety, and performance longevity. Outdoor antennas face brutal environmental stress. A 24 dBi dish at 5 GHz has a beamwidth as narrow as 10–15 degrees. A mere 5-degree shift due to wind flex or pole sag misaligns your entire link—potentially dropping your connection completely. Heavy snow loads, UV degradation on plastics, and galvanic corrosion between dissimilar metals (like aluminum mast + steel bolts) destroy improperly mounted gear within 2–3 seasons. Always use UV-rated cable jackets, waterproof coax seals, and stainless-steel hardware. For rooftop mounts, calculate wind load: a 2 ft² antenna in 60 mph winds needs hardware rated for over 50 lbs of sheer force.
Steer Clear of Three Common Pitfalls:
- DIY Cable Fails: Avoid cheap RG-58 coax for runs over 15 ft. Its high signal loss (26 dB/100 ft at 2.4 GHz) negates antenna gain. Use low-loss cable like LMR-400 (6.7 dB/100 ft).
- Magic Mount Mirage: Magnetic roof mounts seem easy but detach above 60 mph. Use U-bolts or welded mast plates.
- Line-of-Sight Illusion: Mounting below rooflines (e.g., on a sidewall) often blocks Fresnel Zone clearance. Get antennas above obstructions.
The Bottom Line: Measure your space first. If installing outdoors, prioritize rigid mounts (e.g., pole mounts rated >75 lbs) over flimsy wall brackets. For leases or aesthetic limits, consider camouflage-rated antennas or internal attic mounts—just remember asphalt shingles attenuate 2.4 GHz signals by 12–20 dB. Match the antenna’s physical footprint to your real-world environment. No antenna performs well in a closet or wobbling on a weak pole.


