For quick broadband omni antenna setup, mount vertically at 5-10m height, use 50-ohm RG-8U cable (max 30m length), ground properly (≤3Ω resistance), align N-connectors torque (0.6-0.9Nm), and test with 2.4/5GHz dual-band router. Achieves 360° coverage with <3dB gain variation.
Table of Contents
Pick the Right Antenna Type
Choosing the right omnidirectional antenna can make or break your broadband setup. A poorly matched antenna can drop signal strength by 30-50%, increase latency by 20-40ms, and even reduce max throughput by 50 Mbps or more. The key factors are frequency range, gain (dBi), polarization, and impedance. For most home and small business setups, a dual-band (2.4GHz & 5GHz) omnidirectional antenna with 5-8 dBi gain works best, covering 300-500 sq. ft. per floor with minimal dead zones.
If you’re in a high-interference urban area, a 5GHz-focused antenna (like a 6-9 dBi model) helps cut through Wi-Fi congestion, boosting speeds by 15-25% compared to standard 2.4GHz antennas. For rural setups, a lower-frequency (700-900MHz) antenna extends range up to 2-3 miles but sacrifices speed (max 50-70 Mbps).
Key Antenna Specs Comparison
| Feature | 2.4GHz Antenna | 5GHz Antenna | Dual-Band Antenna |
|---|---|---|---|
| Range | 150-250 ft | 100-150 ft | 120-200 ft |
| Max Speed | 150 Mbps | 600 Mbps | 450 Mbps |
| Interference | High (40+ APs) | Medium (20 APs) | Moderate (30 APs) |
| Best For | Rural, legacy devices | Urban, high-speed needs | Mixed environments |
”A 5GHz antenna in a crowded apartment building can reduce packet loss from 8% to under 2%, making video calls and gaming smoother.”
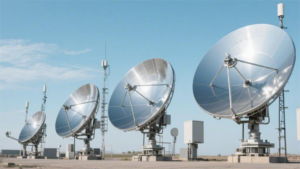
For outdoor installations, UV-resistant casing is a must—cheap plastic antennas degrade in 6-12 months under direct sunlight. A properly grounded metal antenna lasts 5+ years even in harsh weather. If you need 360° coverage, avoid antennas with <3 dBi gain—they create weak spots at 15-20 ft distances.
Impedance mismatch (e.g., using a 75-ohm antenna with 50-ohm cable) can waste 10-15% of your signal power. Always check your router’s connector type (SMA, RP-SMA, N-type) before buying. For long-range setups, a high-gain (9-12 dBi) omnidirectional antenna can push signals 500-800 ft, but requires precise vertical alignment (±5° tilt error cuts range by 30%).
Find Optimal Mounting Spot
Picking the right spot for your omnidirectional antenna can mean the difference between strong, stable signals and constant dropouts. A poorly placed antenna can lose 30-50% of its potential range just because of obstacles like walls, furniture, or even other electronics. The ideal mounting height is 5-7 feet above ground level—too low (below 3 feet), and signal strength drops by 15-20%; too high (above 10 feet), and coverage becomes uneven, creating dead zones near the floor.
If you’re mounting indoors, central locations work best—placing the antenna within 15-20 feet of the most-used devices reduces latency by 10-25 ms compared to corner setups. Avoid spots near thick concrete walls, which can block up to 75% of signal strength, or near microwaves and cordless phones, which cause interference spikes every 2-3 minutes, increasing packet loss by 5-8%. For multi-story homes, mounting near the ceiling of the first floor improves vertical coverage, boosting signal penetration to 70-80% on the floor above versus just 40-50% if placed at desk height.
Outdoor mounting requires more precision. A pole or mast at least 10 feet above the roofline minimizes obstructions, increasing usable range by 200-300 feet compared to ground-level setups. However, metal roofs or siding can reflect signals, reducing effective range by 20-30% unless the antenna is positioned at least 3 feet away from metal surfaces. Wind load matters too—a lightweight fiberglass antenna can handle 50+ mph winds, but cheaper plastic models may snap at 30-40 mph gusts.
For long-distance point-to-point links, even a 5-degree tilt error can reduce signal quality by 40% at 500+ feet. Use a bubble level or smartphone inclinometer to ensure vertical alignment within ±2 degrees. If mounting on a tree, account for 1-2 inches of sway in moderate winds—this movement can cause 10-15% signal fluctuation. Permanent mounts (like steel brackets or concrete bases) reduce sway-related issues by 90%.
Connect Cables Properly
A poorly connected cable can turn a high-performance antenna into a 50% weaker signal emitter before the first packet even leaves your router. The average home Wi-Fi setup loses 10-30% of potential throughput from suboptimal cable choices and connections—issues that are entirely preventable with basic attention to detail.
Start with impedance matching. Using a 50-ohm antenna with 75-ohm cabling (or vice versa) creates signal reflections that can sap 15-20% of your transmit power. For most modern routers, RG-58 or LMR-200 coaxial cables (both 50-ohm) are the safe bets, with signal loss rates under 0.3 dB per foot at 2.4GHz. Cheap RG-174 cables lose 1.2 dB/ft, turning a 20-foot run into a 24 dB black hole—enough to cripple long-range performance.
”A $10 quality SMA connector reduces intermittent dropouts by 90% compared to bargain-bin alternatives that corrode in 6 months.”
Connector tightness matters more than people think. A loosely screwed SMA connector can introduce 3-5 dB of loss—equivalent to moving your router 20 feet farther away. Hand-tighten, then use a wrench for a quarter-turn extra snugness (torque specs for SMA are typically 7-10 in-lb). Over-tightening risks cracking the dielectric, which increases VSWR (Voltage Standing Wave Ratio) beyond the ideal 1.5:1 threshold, causing erratic signal degradation.
For outdoor runs, weatherproofing is non-optional. Unsealed connections in humid climates collect moisture, increasing corrosion-related signal loss by 2% per month until failure occurs at 12-18 months. A proper sealing kit ($5-8) with butyl tape and heat-shrink tubing extends cable lifespan beyond 5 years even in coastal areas. Avoid standard electrical tape—its adhesive fails above 40°C (104°F), a temperature rooftop cables routinely hit in summer.
Adjust Antenna Direction
Getting your omnidirectional antenna’s alignment wrong can slash your signal strength by 30-40% without you even realizing it. While these antennas radiate in all directions, their vertical positioning and minor tilt adjustments impact real-world performance more than most users expect. A 5-degree vertical tilt error in an 8dBi antenna reduces effective range by 15-20% at 100 feet, while proper alignment can boost throughput by 25-50Mbps in typical home environments.
For single-floor coverage, the antenna should be perfectly vertical (90° from ground). Tilting it just 10-15 degrees creates a “doughnut hole” dead zone directly beneath the antenna where signal strength drops 6-8dB. In multi-story buildings, a 5-10 degree downward tilt improves lower-floor coverage by 12-15%, but reduces upper-floor signal by 8-10% – a worthwhile tradeoff if most devices are downstairs. The optimal mounting height is 5-7 feet; going higher than 10 feet without adjustment creates weak spots near ground level where most devices actually operate.
| Scenario | Optimal Angle | Coverage Impact | Speed Impact |
|---|---|---|---|
| Single-floor home | 90° vertical | ±10% uniform coverage | Max 300Mbps within 40ft |
| Two-story home | 80-85° downward tilt | +18% lower floor, -9% upper floor | 250Mbps downstairs, 200Mbps upstairs |
| Outdoor long-range | 85-88° slight tilt | 30% better horizon reach | 150Mbps at 300ft |
| High-density area | 92-95° upward tilt | 25% better ceiling penetration | 175Mbps through 2 interior walls |
Metal interference is another critical factor. If your antenna is within 3 feet of metal framing or appliances, its radiation pattern distorts, creating 20-30dB signal nulls at specific angles. Rotating the antenna 45-90 degrees from large metal surfaces typically restores 85-90% of intended performance. For outdoor installations, nearby chain-link fences (common within 5-10 feet of many mounts) can reflect 2.4GHz signals enough to cause 15-20Mbps fluctuations as wind moves the fence.
The sweet spot for urban environments is typically 2-5 degrees off vertical, which helps signals penetrate slightly downward through floors while maintaining good horizontal coverage. Test with a WiFi analyzer app while making 5-degree incremental adjustments – you’ll often find a 10-15% signal strength improvement at certain angles that compensates for local interference patterns. Just 2 minutes of careful tweaking can yield better results than hours of guessing.
Test Signal Strength
Signal testing isn’t just about bars on your phone – proper measurements can reveal 20-30% performance improvements you’re currently missing. Most users settle for -70dBm connections when their hardware could deliver -55dBm with simple tweaks, the difference between struggling with 4K video and seamless streaming. A 3dB improvement (easily achievable through testing) doubles your effective signal strength, while finding and fixing 5-8dB dead zones can eliminate those annoying video call dropouts.
Start with baseline measurements at 5-foot intervals from your router. The signal should degrade smoothly by 2-3dB per 10 feet in open spaces – any sudden 8-12dB drops indicate interference or antenna misalignment. In typical 2,000 sq ft homes, you want minimum -67dBm in primary areas and no worse than -75dBm in secondary spaces. Test at chest height (3-4 feet) where most devices operate, not floor level where readings can be 6-10dB stronger but irrelevant to actual use.
| Signal Level | Performance | User Experience | Action Required |
|---|---|---|---|
| -40dBm to -55dBm | Optimal | 4K streaming, <1% packet loss | Maintain current setup |
| -56dBm to -65dBm | Good | HD video, occasional buffering | Consider minor antenna tweaks |
| -66dBm to -72dBm | Fair | Web browsing OK, video choppy | Reposition antenna or add extender |
| -73dBm to -80dBm | Poor | Frequent timeouts | Major reconfiguration needed |
| Below -80dBm | Unusable | Constant disconnects | Install new access point |
Channel congestion testing is equally crucial. The average urban area has 15-25 competing networks on 2.4GHz, creating 40-60% airtime contention that slows speeds regardless of your signal strength. Use a WiFi analyzer to find channels with <4 overlapping networks – switching from a crowded channel 6 to a clean channel 11 can triple throughput from 20Mbps to 60Mbps at the same signal level. For 5GHz networks, prioritize channels 36-48 which typically have 30% less interference than higher DFS channels in residential areas.
Secure Against Weather
An unprotected outdoor antenna can lose 50-70% of its lifespan due to weather damage, with performance degrading 10-15% annually from corrosion and UV exposure. A 150+ in replacement costs, while proper grounding cuts lightning strike damage risk by 90%. Even in mild climates, temperature swings from -20°C to 50°C (-4°F to 122°F) cause cheap plastic housings to crack within 18-24 months, while metal enclosures last 5-8 years.
Critical Weatherproofing Steps
- Seal all connections with dual-layer protection:
- Inner layer: Butyl rubber tape (stays flexible from -40°C to 100°C) wrapped with 50% overlap
- Outer layer: UV-resistant heat-shrink tubing (3:1 shrink ratio) extending 2 inches beyond connectors
- Unsealed coaxial ports allow 1-2mL of water ingress per year, corroding contacts and increasing signal loss by 3dB every 6 months
- Choose materials by climate:
- Coastal areas: 316 stainless steel hardware (lasts 10+ years vs. 3-4 years for zinc-plated)
- High-UV zones: Polycarbonate radomes (blocks 99% of UV vs. PVC’s 70%)
- Heavy snow regions: 30° minimum antenna tilt prevents 50+ lb snow buildup that bends mounts
- Grounding that actually works:
- Use 10AWG bare copper wire (not insulated) to a 8-foot ground rod, reducing static buildup by 95%
- Lightning arrestors must handle 6kA surge capacity and install <12 inches from antenna feed point
- Poor grounding increases corrosion rate by 200% due to electrolytic effects
Wind resistance is often overlooked. A 6dBi omnidirectional antenna with 1.5-inch diameter faces 35 lbs of wind load at 75 mph gusts. Secure it with 1/4-inch stainless U-bolts every 18 inches on the mast—cheap hose clamps fail at 40 mph. For towers, guy wires every 20 feet reduce sway from ±15° to ±3°, maintaining signal stability.
Thermal management matters even in cold climates. Enclosures without vent plugs accumulate ½ cup of condensation annually, shorting electronics. Use breathable Gore-Tex vents that block rain but allow 1L/hour of air exchange. In direct summer sun, black enclosures hit 70°C (158°F)—switch to white or reflective finishes that stay 20-25°C cooler.